Update Contact Details Submit Action
To use Marketing Automation you need a contact in xDB. Ideally, this contact should be identified. Luckily, Sitecore published great article how to implement Forms submit action, which maps form fields to the first name, last name and email of xDB contact. You don’t need to write this code by your own. You can find it on my github project, or even download ready-to-use Sitecore package containing the submit action.
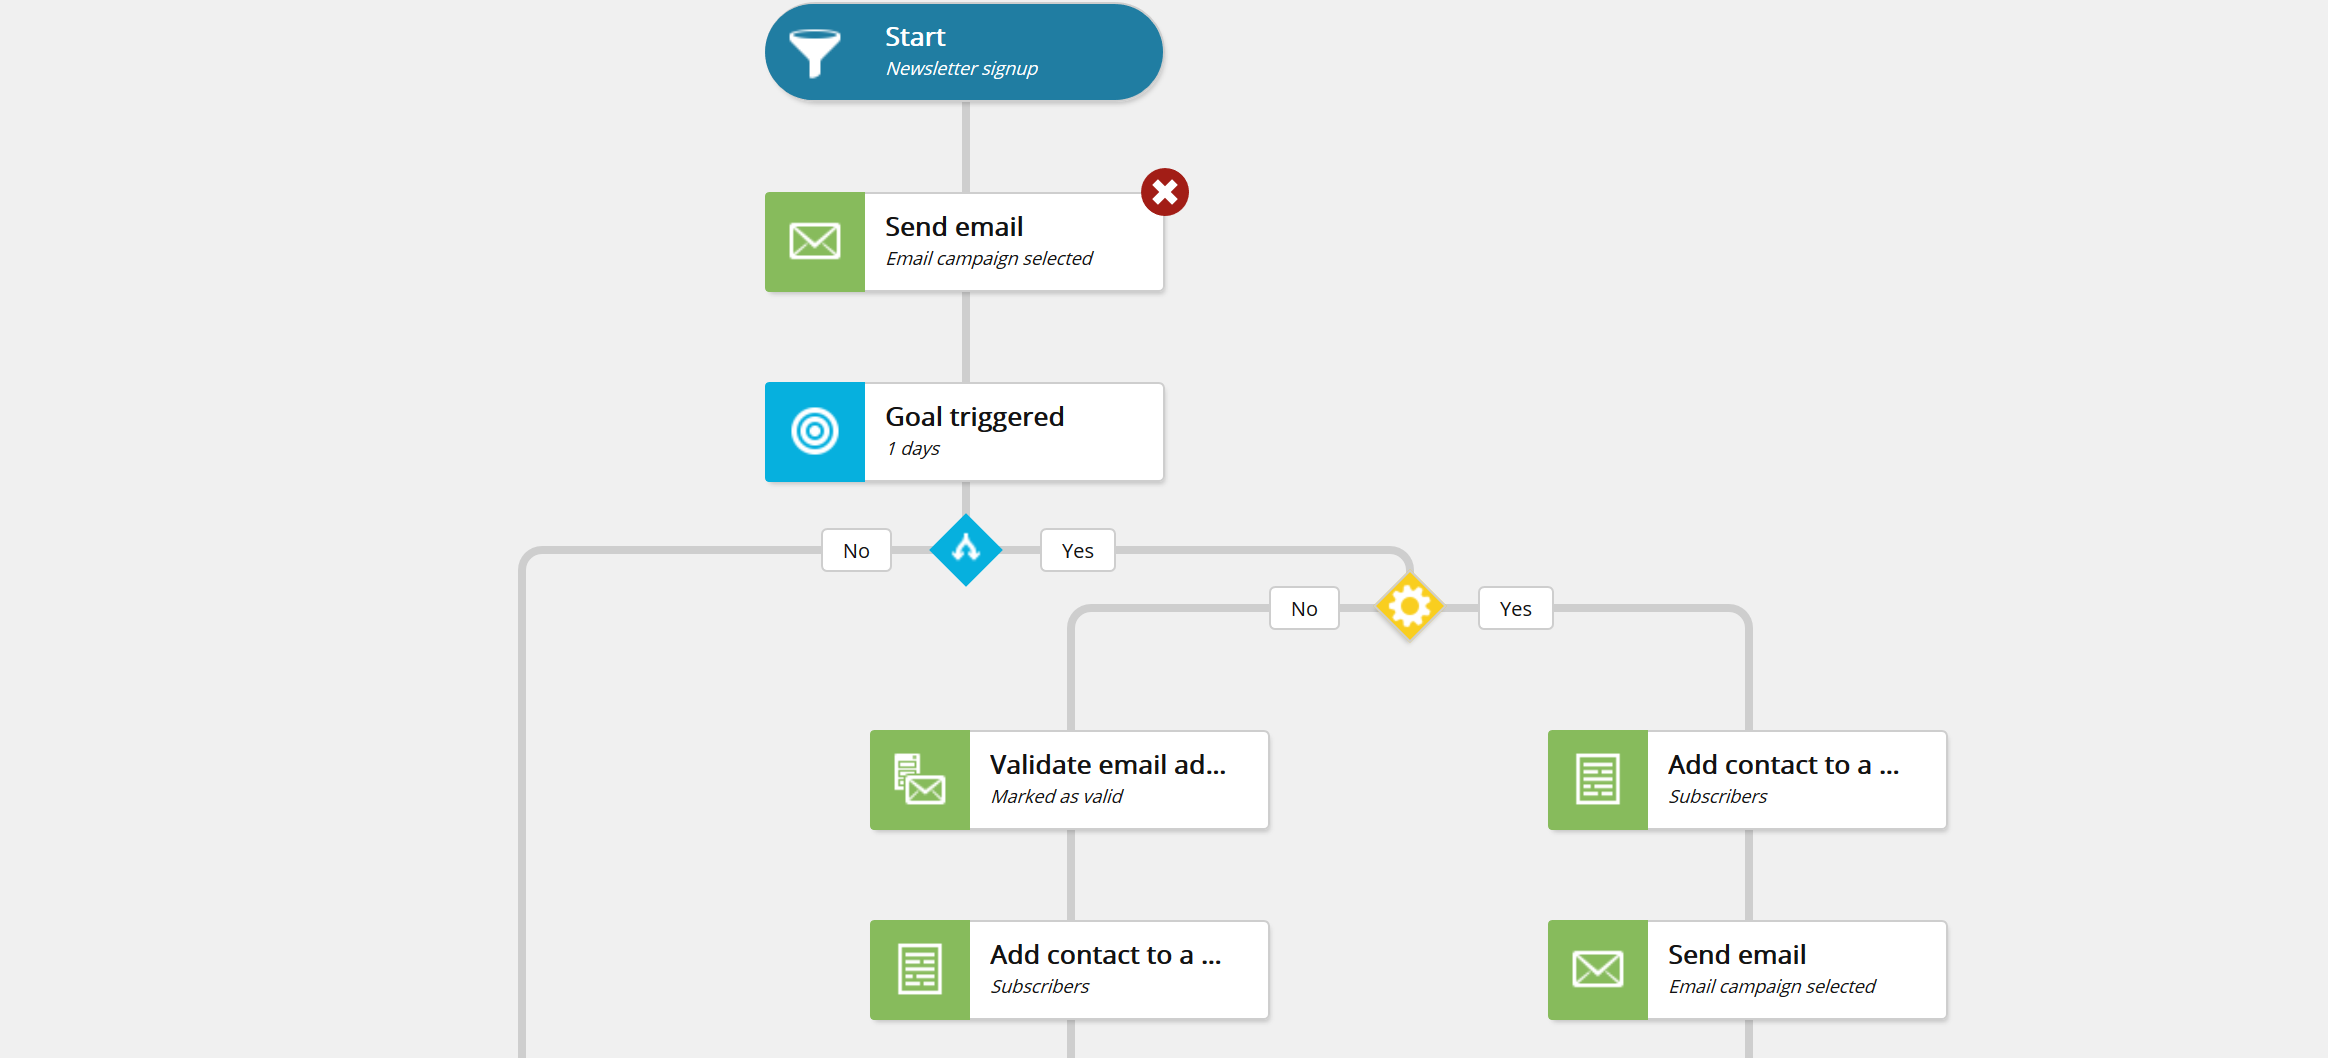
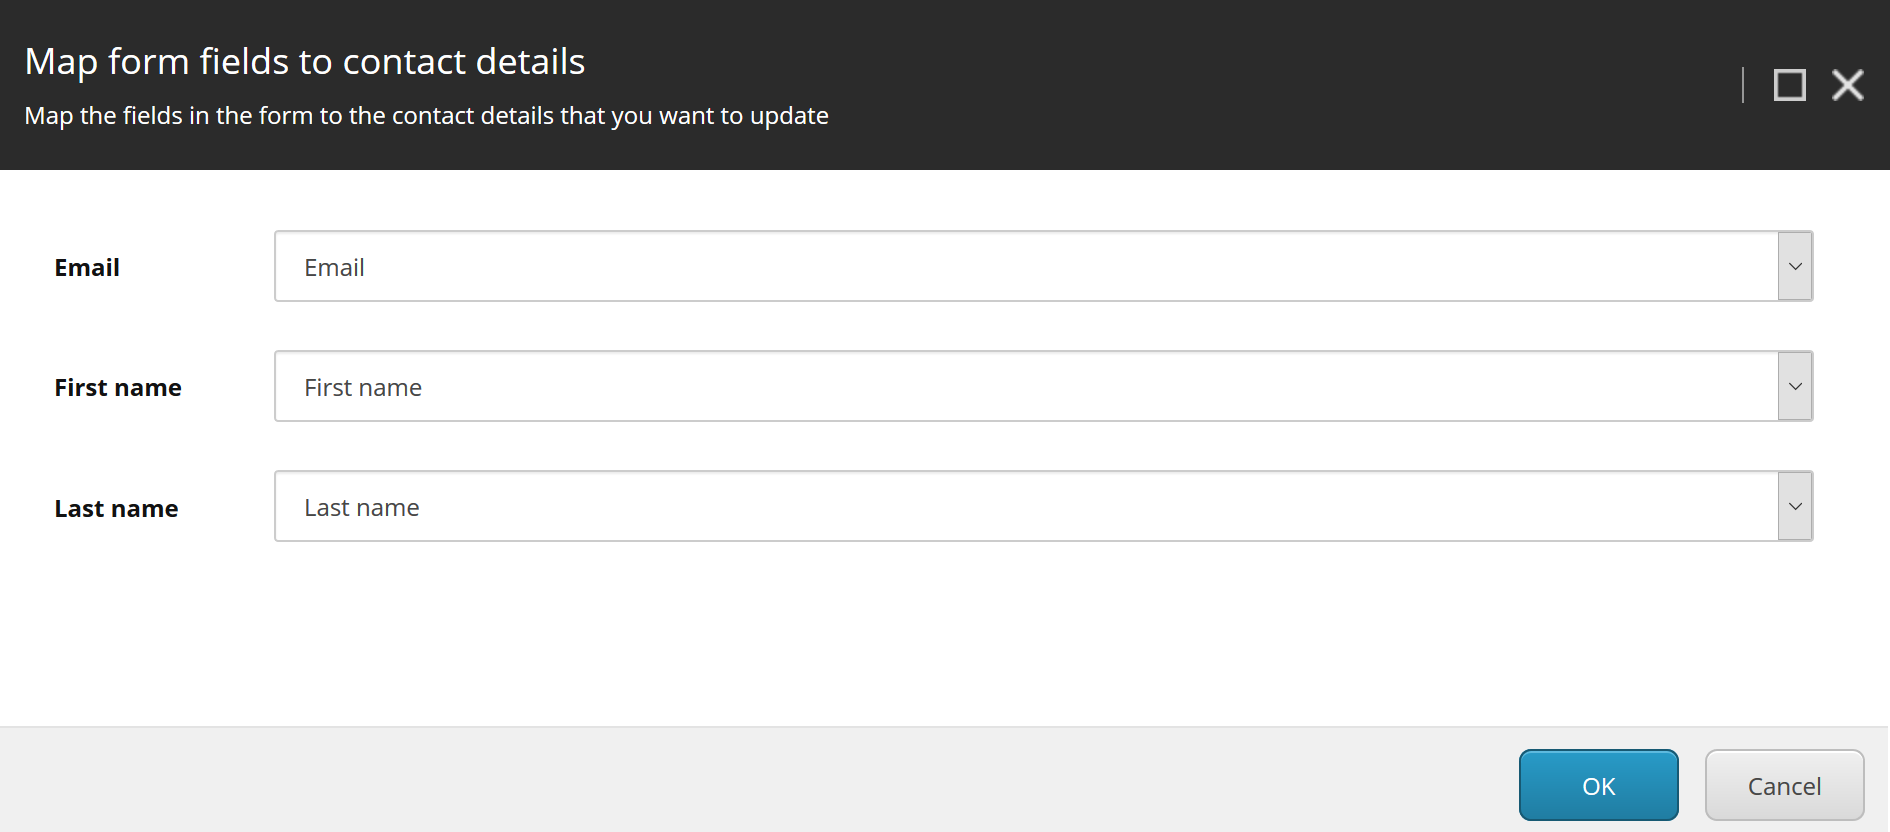
Action is really easy to use. In the Forms designer, you just add it to submit button and map selected field to contact’s facet:
Implement Custom Activity or Condition
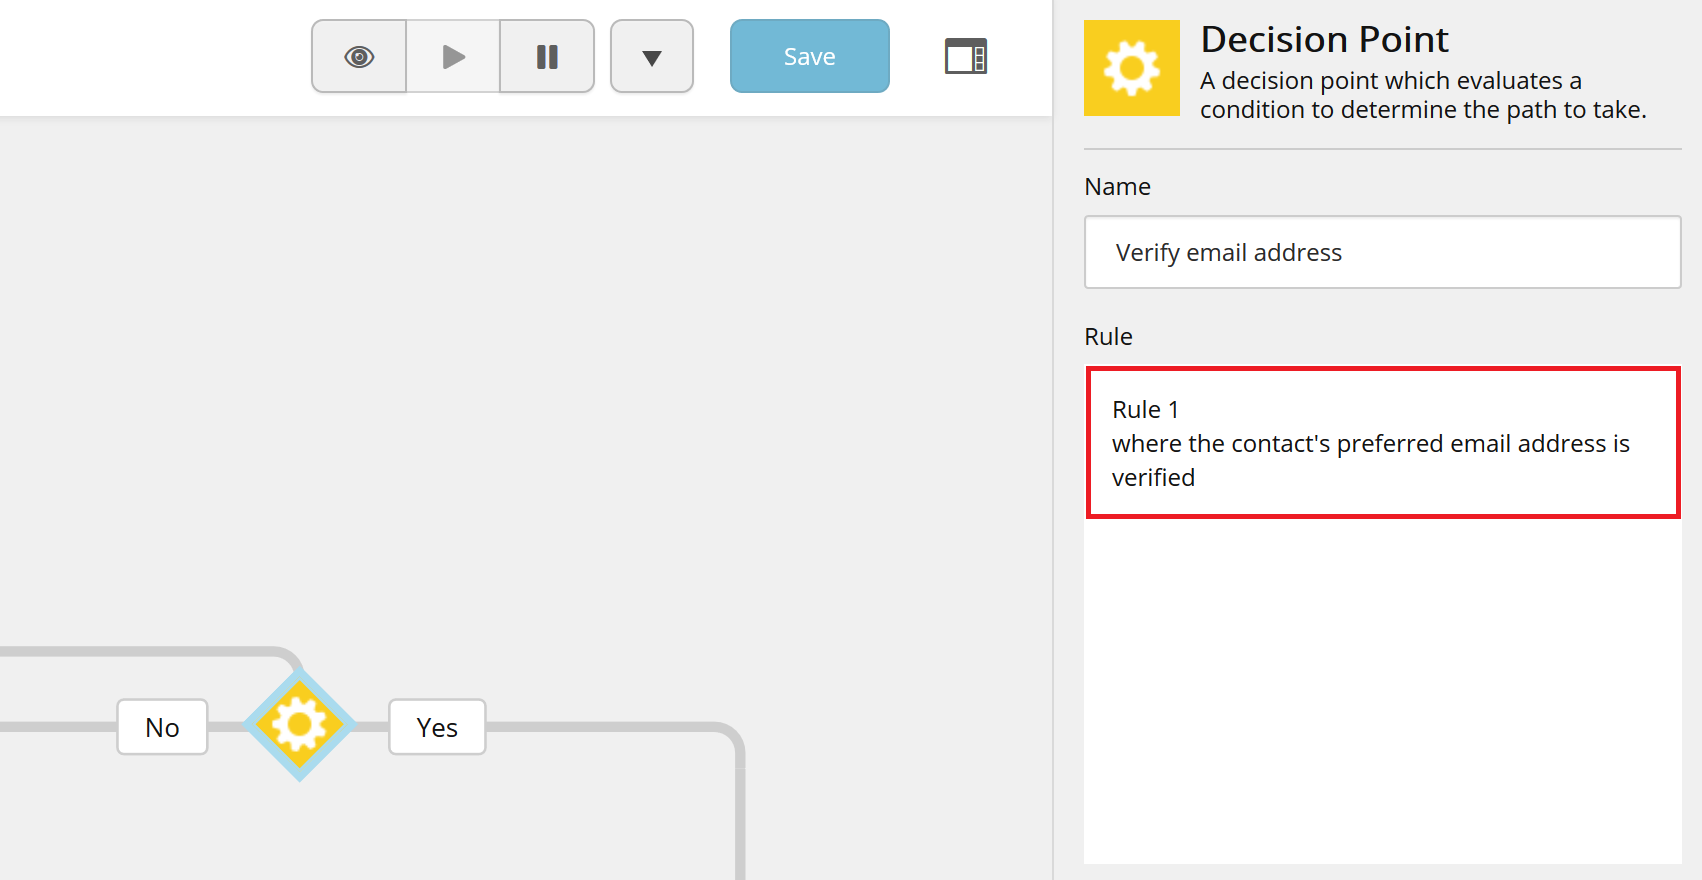
Nothing to add, there are already great tutorials from Sitecore to create custom activity, or to create custom condition for Marketing Automation. If you want some ready-to-use sample, you can check my github project, or download package. After the installation, you should see new rules engine’s condition, which you can use in Marketing Automation. Don’t forget to deploy it to the automation engine too.
Deploy Code to Marketing Automation Engine
After you implement custom condition or activity, you should deploy binary with your code to the Sitecore server, but also to the marketing automation engine, together with additional .xml file for the configuration. Marketing Automation Engine is a Windows Service, installed together with xConnect. By default it’s placed in {xConnectRootFolder}\App_data\jobs\continuous\AutomationEngine. For example: C:\inetpub\wwwroot\sc90.xconnect\App_data\jobs\continuous\AutomationEngine.
In Helix solution you typically have web project(s) with your code, which you deploy to the Sitecore server with Visual Studio Publish. To deploy it to Marketing Automation automatically as well, you can edit this project .csproj file and add following node under <Project>:
|
1 2 3 4 5 6 7 8 9 |
<Target Name="CopyToAutomationEngine" AfterTargets="CopyAllFilesToSingleFolderForPackage"> <Copy SourceFiles="$(TargetPath)" DestinationFolder="$(AutomationEnginePath)" SkipUnchangedFiles="true" OverwriteReadOnlyFiles="true" Retries="3" RetryDelayMilliseconds="300" /> <ItemGroup> <ConfigItems Include="$(SolutionDir)\AutomationEngine\**\*" /> </ItemGroup> <Copy SourceFiles="@(ConfigItems)" DestinationFiles="@(ConfigItems->'$(AutomationEnginePath)\%(RecursiveDir)%(Filename)%(Extension)')" SkipUnchangedFiles="true" OverwriteReadOnlyFiles="true" Retries="3" RetryDelayMilliseconds="300" /> </Target> |
This custom msbuild target will deploy project’s dll and config files from selected folder to automation engine directory, after publishing web project from Visual Studio (you can change it to <Target Name="AfterBuild"> so it will deploy your code after the build instead).
The script uses @(AutomationEnginePath) variable, which I defined in publishingsettings.targets file (you probably have it, if your solution is based on Sitecore Habitat). This variable points to Marketing Automation Engine directory in xConnect:
|
1 2 3 4 5 6 |
<Project ToolsVersion="4.0" xmlns="http://schemas.microsoft.com/developer/msbuild/2003"> <PropertyGroup> <publishUrl>http://sc90.local/</publishUrl> <AutomationEnginePath>C:\inetpub\wwwroot\sc90.xconnect\App_data\jobs\continuous\AutomationEngine\</AutomationEnginePath> </PropertyGroup> </Project> |
publishsettings.targets file is referenced in web project’s Properties\PublishProfiles\{Profile-Name}.pubxml file:
|
1 2 3 4 5 6 7 8 9 10 11 12 13 14 |
<?xml version="1.0" encoding="utf-8"?> <Project ToolsVersion="4.0" xmlns="http://schemas.microsoft.com/developer/msbuild/2003"> <Import Project="..\..\..\..\..\..\publishsettings.targets" /> <PropertyGroup> <WebPublishMethod>FileSystem</WebPublishMethod> <LastUsedBuildConfiguration>Debug</LastUsedBuildConfiguration> <LastUsedPlatform>Any CPU</LastUsedPlatform> <SiteUrlToLaunchAfterPublish /> <LaunchSiteAfterPublish>True</LaunchSiteAfterPublish> <ExcludeApp_Data>False</ExcludeApp_Data> <DeleteExistingFiles>False</DeleteExistingFiles> </PropertyGroup> </Project> |
Additionally, I put in the solution .xml file needed in Marketing Automation Engine for my custom condition. Because it’s not needed in Sitecore server, I put it outside web project. Script will copy the file to Marketing Automation Engine preserving folder structure:
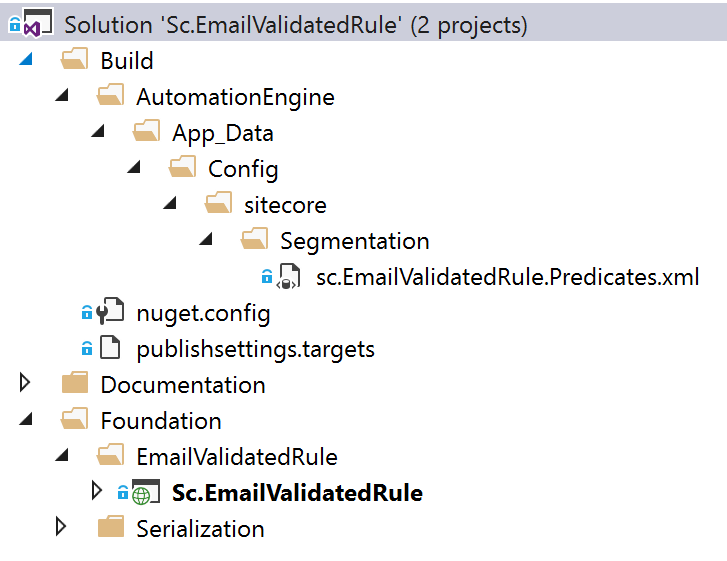
You can check example project settings for Automation Engine deployment in my EmailValidatedRule project on github.
Debugging Code Deployed to Marketing Automation Engine
To debug your code deployed to Automation Engine you need to attach to the engine process. In Visual Studio go to Debug -> Attach to Process… and select maengine.exe (if not shown on the list you need to check “Show process for all users”):